Due to a server exploit, most of the images in my blog are gone. I don’t have a backup and my provider also seems to have none. I will try to restore most of the documents by time. Step by step, as i will load them up to the server again. Seem like it has been an apache module exploit. The admin must have been a bit to lazy. I just wonder how you can have that much time to destroy foreign webservers.
19. Mai 2007
dynamips real world communication
*** Error: Connecting SW1 F1/12 to NIO_linux_eth:eth0 resulted in
206-unable to create Linux raw ethernet NIO
With this error messages dynamips tells you it’s not able to create the device under linux. So maybe the dynamips process is not running with the right permissions to do so. Probably you run dynamips as a normal user. Try to run it as root.
17. Mai 2007
dynampis with internetworkexpert version 4.0
It does work. 🙂
I can boot 6 routers, 4 switches and 3 backbone routers alltogether and the machine is still usable.
I had a 1,6 Mhz Machine before and i could not startup all simulations, because after the 6-8 simulations, the notebook got unusable. I had enough RAM but the cpu was not able to handle the load.

Now i’m using a SuSE 10.2 installation with dynamips-0.2.7-RC3-amd64.bin on a t60 notebook (2,1 DuoCore, 3GB). You don’t even need that much ram, but the cpu power you will definitely.
All routers and switches respand fast. You will need a good idlepc value to save cpu cycles.
Just test it on the dynagen console with „idlepc get R1“ for example. Probably you will set up the same value for all your routers.

13. Mai 2007
thinkfinger and ibm thinkpad t60 / fingerprint reader
Adding the fingerprint reader as optional authentication is easy.
Get the thinkfinger-0.3 package (http://thinkfinger.sourceforge.net/) compile it. After the make install, you have to adjust /etc/pam.d/common-auth to look like this:
auth required pam_env.so
auth sufficient pam_thinkfinger.so
auth required pam_unix2.so # debug cann be added to see if somethings missing
After adding some fingerprints with the tf-tool to /etc/pam_thinkfinger/[username].bir
you should be able to also authenticate by your fingerprint:
cisco@lap:~> su –
Password or swipe finger:
lap:~ #
In you syslog, you should see:
kerel: input: Virtual ThinkFinger Keyboard as /class/input/input6
ibm t60 wide screen with ATI Technologies Radeon Mobility X1400 rev 0
I trying to get the advanced mini dock to work and this gives me really a hard time regarding to an attached external monitor. I can get both screens in clone mode, so t60 screen is turned of and the external monitor is on, but i can set up a different resolution for the lcd screen with the ati driver and the fglrx driver. Even switched dpms off, but that does not help.
Section „ServerLayout“
Identifier „Layout[all]“
Screen 0 „aticonfig-Screen[0]“ 0 0
InputDevice „Keyboard[0]“ „CoreKeyboard“
InputDevice „Mouse[1]“ „CorePointer“
InputDevice „Mouse[3]“ „SendCoreEvents“
Option „Clone“ „off“
Option „Xinerama“ „off“
EndSection
Section „Module“
Load „dbe“
Load „type1“
Load „freetype“
Load „extmod“
Load „glx“
Load „v4l“
EndSection
Section „ServerFlags“
Option „AllowMouseOpenFail“ „on“
EndSection
Section „InputDevice“
Identifier „Keyboard[0]“
Driver „kbd“
Option „Protocol“ „Standard“
Option „XkbLayout“ „us“
Option „XkbModel“ „pc104“
Option „XkbRules“ „xfree86“
EndSection
Section „InputDevice“
Identifier „Mouse[1]“
Driver „mouse“
Option „Buttons“ „7“
Option „Device“ „/dev/input/mice“
Option „Name“ „Microsoft IntelliMouse Optical“
Option „Protocol“ „explorerps/2“
Option „Vendor“ „Sysp“
Option „ZAxisMapping“ „4 5“
EndSection
Section „Modes“
Identifier „Modes[0]“
ModeLine „800×600“ 38.2 800 832 912 1024 600 601 604 622
ModeLine „800×600“ 34.8 800 848 880 960 600 603 607 617 +hsync -vsync
ModeLine „768×576“ 35.0 768 792 872 976 576 577 580 597
ModeLine „768×576“ 32.2 768 816 848 928 576 579 583 593 +hsync -vsync
ModeLine „640×480“ 23.9 640 656 720 800 480 481 484 497
ModeLine „640×480“ 23.2 640 688 720 800 480 483 487 494 +hsync -vsync
EndSection
Section „Monitor“
Identifier „aticonfig-Monitor[0]“
Option „VendorName“ „ATI Proprietary Driver“
Option „ModelName“ „Generic Autodetecting Monitor“
Option „noDPMS“ „true“
EndSection
Section „Monitor“
Identifier „aticonfig-Monitor[1]“
Option „VendorName“ „ATI Proprietary Driver“
Option „ModelName“ „Generic Autodetecting Monitor“
Option „noDPMS“ „true“
EndSection
Section „Device“
Identifier „aticonfig-Device[0]“
Driver „fglrx“
Option „DesktopSetup“ „clone“
Option „MonitorLayout“ „LVDS,CRT1“
Option „ForceMonitors“ „LVDS,CRT1“
Option „Centermode“ „off“
Option „VideoOverlay“ „on“
Option „OpenGLOverlay“ „off“
Option „OverlayOnCRTC2“ „0“
Option „PseudoColorVisuals“ „off“
Option „UseFastTLS“ „off“
Option „Mode2“ „1280×1024,1024×768,800×600,640×480“
Option „EnableMonitor“ „crt1“
BusID „PCI:1:0:0“
EndSection
Section „Screen“
Identifier „aticonfig-Screen[0]“
Device „aticonfig-Device[0]“
Monitor „aticonfig-Monitor[0]“
DefaultDepth 24
SubSection „Display“
Viewport 0 0
Depth 24
Modes „1680×1050“
EndSubSection
EndSection
Section „DRI“
Group „video“
Mode 0660
EndSection
Everythings else does work.
Here are some good links for configuring things:
http://www.thinkwiki.org/wiki/ATI_Mobility_Radeon_X1400
http://download.hao.ucar.edu/pub/navarro/FC5_on_T60p/configuring.txt
http://www.lugt.at/hilfe/howto/dual-screen-on-radeon
9. Mai 2007
ibm t60 SuSE 10.2 Installation
First i completly formated the harddisc. I did not need the recovery partiotion, which is included with the thinkvantage button. I just remove the whole microsoft installation. Don’t know for what i need this.
Then you could think of to make some encrypted partitions, but this could not be the „/“ partition. So i was leasy and did not configure any encryption. I will do so an the additional disc i have.
I use the gnome desktop for installation, because for me KDE is a bit to much of the buttons and choices possible. I like it easy and simple to configure. KDE is to feature overloaded for me.
I just booted the SuSE 10.2 DVD and started installation and this has become nearly a one click installation.
What i ask myself always, why they change that much all default things every time. So once you have installed the new system, you have to discovery you tools first. Same like for vista. Someone should just think that many things have changed, but it’s only the same with a new look.
I needed to install additional drivers for the ati radeon mobility grafics card. You can just download the driver from the ati hompage.
Then i did a online update to make sure all packages are updated to the newest release.
The fingerprint reader …
To be continued….
8. Mai 2007
ibm t60
Long time no upgrade. I’m currently have to work a lot and travel much. Just came back from paris and another Telepresence installation. Next week i will be in Hannover.
But i got a new notebook. I’m quite happy with the new t60. I was looking at a lot of notebooks, but i needed the new dual core and the t60 seems like a good choice for cpu intensive work, like vmware and dynamips. So i will be able to run some instances and test more on the new notebook. The notebook comes with 2,16Ghz and i will upgrade it to 3GB main memory soon and later on to 4 GB. Maybe later on i will provide some pictures and maybe some installations guides for the SuSE 10.2 distribution. It will be a pure Linux notebook of course. 🙂 Nothings else needed. Anything else can be done with vmware. A nice thing is the fingerprint reader. You don’t need to type a password anymore and the Gnome Desktop seems to be ready for use.
26. März 2007
IP Communicator and ccm 4.1.3
I should go more for preparing the lab exam again, but currently i’m playing around with callmanager and ip communicator from cisco. IP communicator is a softphone and can be installed on windows os. You then can emualte two cisco phones and do some testing.
Here are two screenshoots of this.


16. März 2007
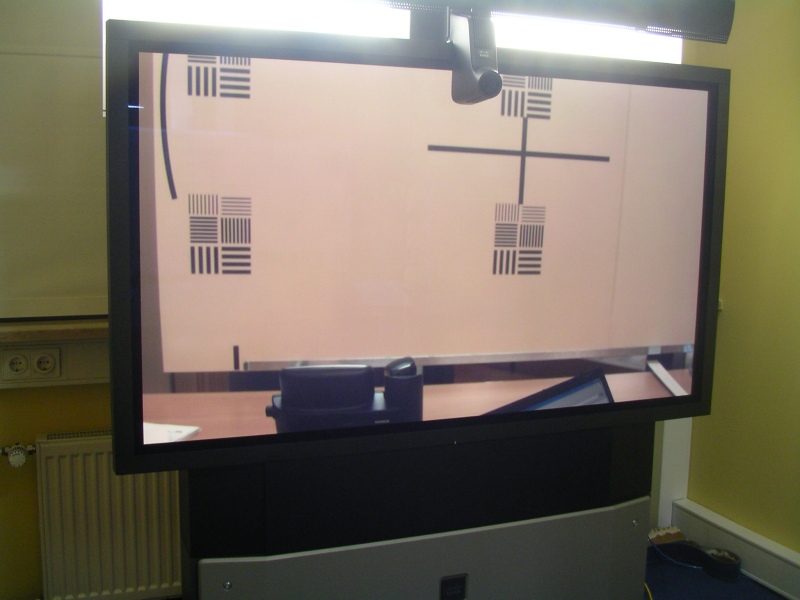
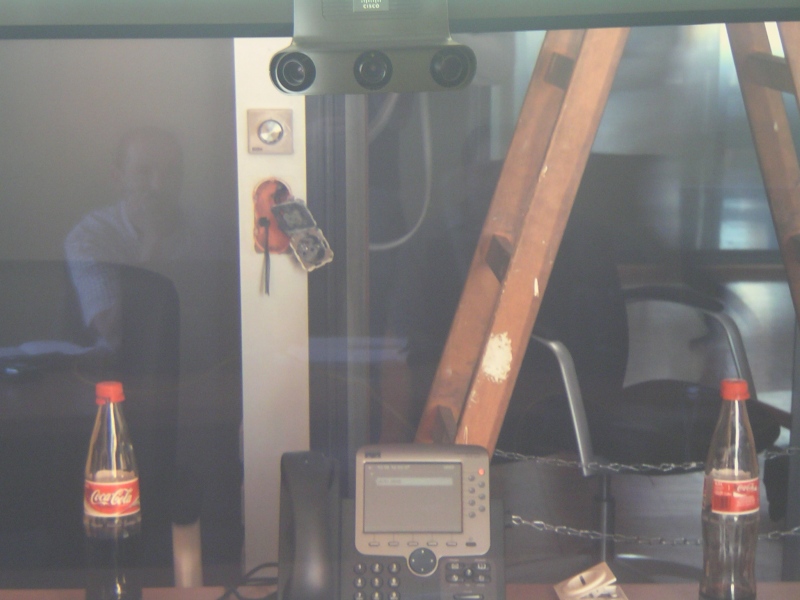
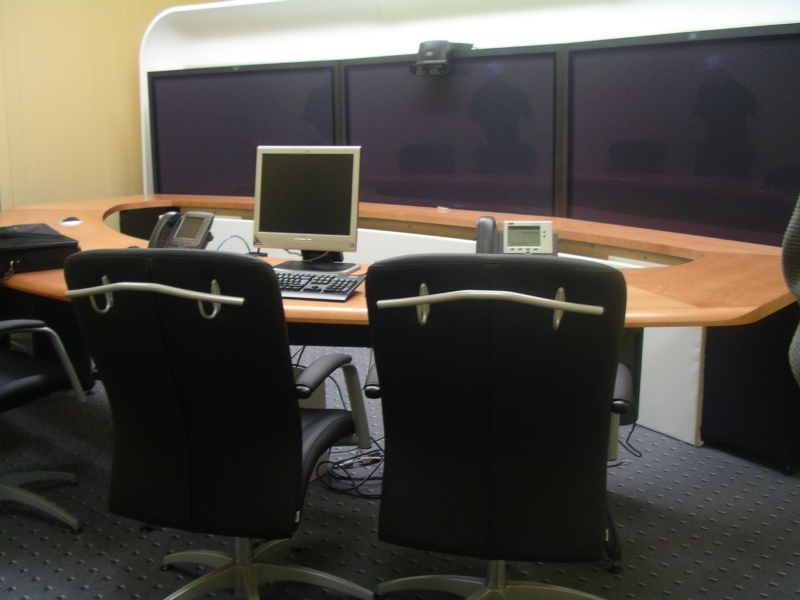
Assembled CTS 1000 / 3000 systems
Romm preperation is very important for both systems. The light is the major factor. Also different soundlevels are needed. You need about 300 – 400 lux in the view to the camera from 9 different areas in the room. The measurement is done in the direction to the camera not to the ceiling.
Also the silence in 6 areas of the room is measured, with AC turned on. And the reflection of noise. There are several tools for measuring this. Cisco is very picky on these values.
Pics:
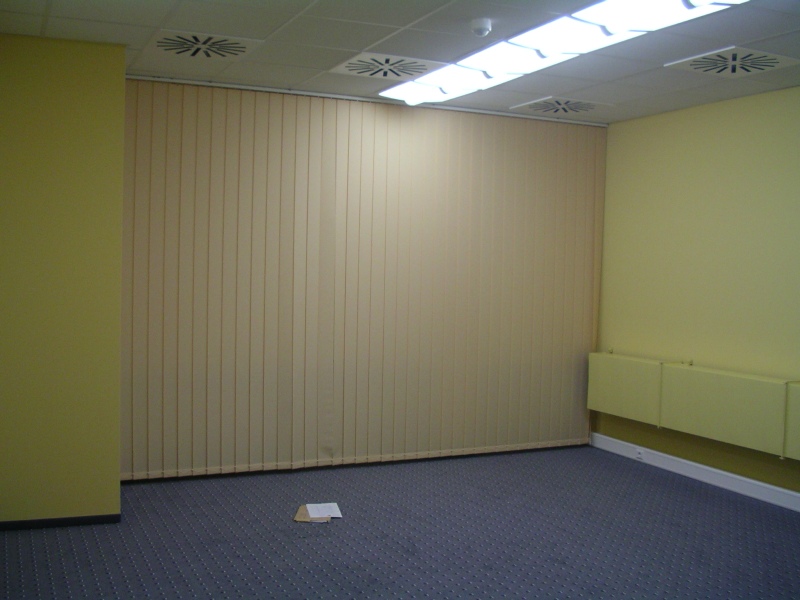
Here the carton for the camara adjustments is just flipped around. On the picture it’s fixed in the wrong way.
15. März 2007
Installing CallManager 4.1.3 on free VMWare Server Edition
Using a fresh Windows 2000 Server installation and CallManager 4.1.3.
After installing Windows Server 2000 on VMware, i took a 15 GB disk and a single processor system.
I had the problem with a windows 2000 server cd and an already applied sp4 without msjava. I had to install java first. It’s available as a file called: MSjavX86.exe.
This is the complete version of ms java.
For the windows 2000 server installation add also the snmp service and IIS.
Importing these registry settings.
————————————————————————
Windows Registry Editor Version 5.00
[HKEY_LOCAL_MACHINE\SOFTWARE\Cisco Systems\Model]
„Hardware“=“MCS7825H02“
„Speed“=“2268“
„Memory“=“2048“
[HKEY_LOCAL_MACHINE\SOFTWARE\Spirian\System Info\OS Image]
„Version“=“2000.2.6“
[HKEY_LOCAL_MACHINE\SOFTWARE\Spirian\System Info\OS Service Release]
„Version“=“2000.2.6sr5“
————————————————————————
Afterwards install the latest OS patches and upgrades:
win-OS-Upgrade-K9.2000-2-7.exe
The system will boot three times.
win-OS-Upgrade-K9.2000-2-7sr8.exe
After that you will have to import these registry setting again:
————————————————————————
[HKEY_LOCAL_MACHINE\SOFTWARE\Cisco Systems\Model]
„Hardware“=“MCS7825H02“
„Speed“=“2268“
„Memory“=“2048“
[HKEY_LOCAL_MACHINE\SOFTWARE\Cisco Systems\Spirian]
„ProductKey“=“BTOOVQESCCJUIEBI“
————————————————————————
Then copy the file shutdown.exe to the following directory:
copy c:\program\cisco\updates\2000 2.7sr8\shutdown.exe to C:\Utils
Then start the callmanager installation by starting ccmsetup.exe
Install CallManager 4.1(3) by inserting the CD and opening the ccmsetup.exe
After Callmanager Reboots check to see if the WorldWideWeb Publishing Service is set to manual and stopped. Set it to automatic and start it.
For installing ccm i had to temporary set the memory to 1024 MB for the virtual machine.

Source:
http://www.networksamurai.org/articles/Callmanager/41VMinstall.html
http://home.arcor.de/jterlinden/java.htm
Another Method using the image CD’s
http://www.ciscoblog.com/archives/2006/06/callmanager_on.html